
IAUL, Episode 3
The Ambiance installation I will use for this "episode" is one I did in my workshop, where I have set up my digital camera and tripod to take the various photos for use in this blog, I use it as a shadow box.
After measuring and cutting the 48" track section to fit in between the sides of the cabinet, I snap a 1-hole clip over the track section about 1" in from the edge of the cabinet. I then apply double stick tape to the back of the cut piece. Using as the clips as guides, I adhere the track to the underside of my cabinet with the clips flush with the cabinet face. I can use as few as two or as many as six clips snapped on to the track, for use as guides, if need be, do whatever is easiest for you. Keep in mind that you will have to un-snap each clip at some point, to insert the Ambiance cable, but you can also slide these clips along the track if need be to get them out of the way. Anyway.. You can see that I have cut a 45 degree miter (sort of, roughly) where the track meets the inside of the cabinet and joins with a vertical piece, also cut at (woof) 45 degrees; don't worry, it's under the cabinet where no-one can see it except you! The vertical side track is also adhered to the side of the cabinet with the double stick tape.
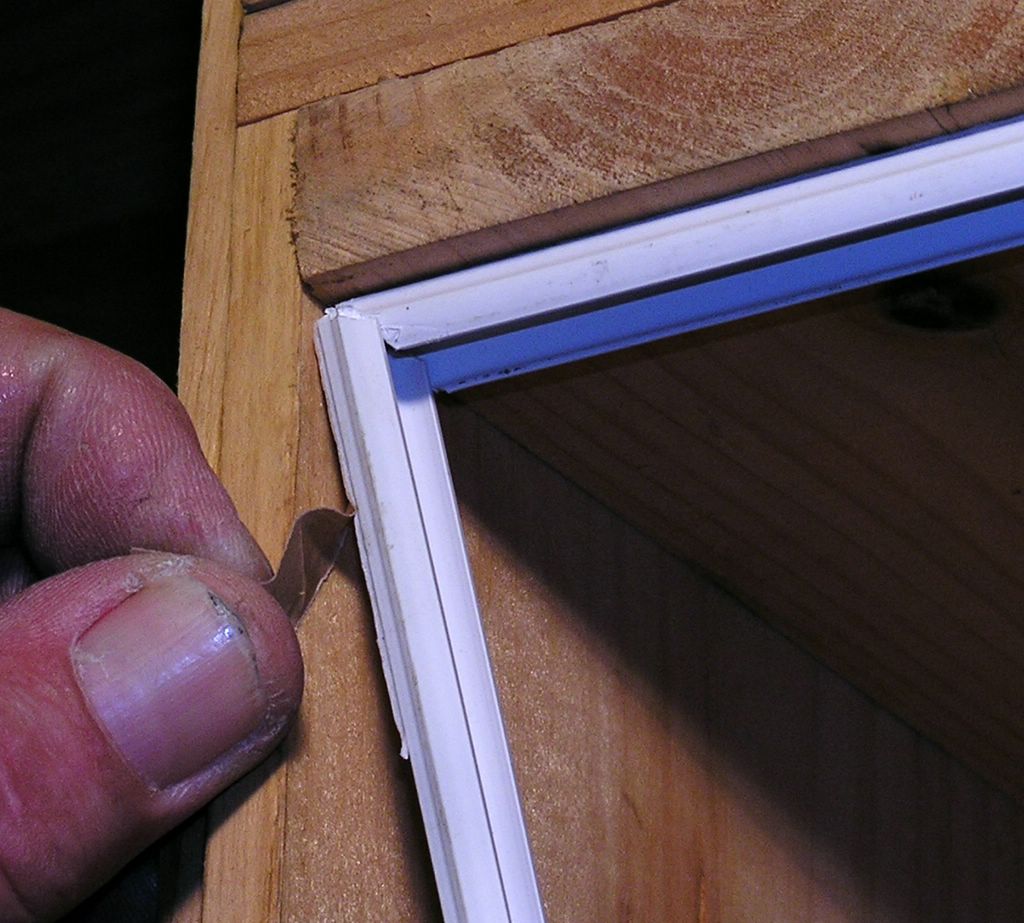
Peeling the backing tape off as you go, align the track section against the style and press it hard against the cabinet surface for full adhesion. In some case the tape will have to be supplemented with a 1-hole clip, permanently mounted in place.
Once the track system is complete the Ambiance cable can be persuaded into the track base. If you intend on using the segmented cable markings, this is the time to line them up as you wish.

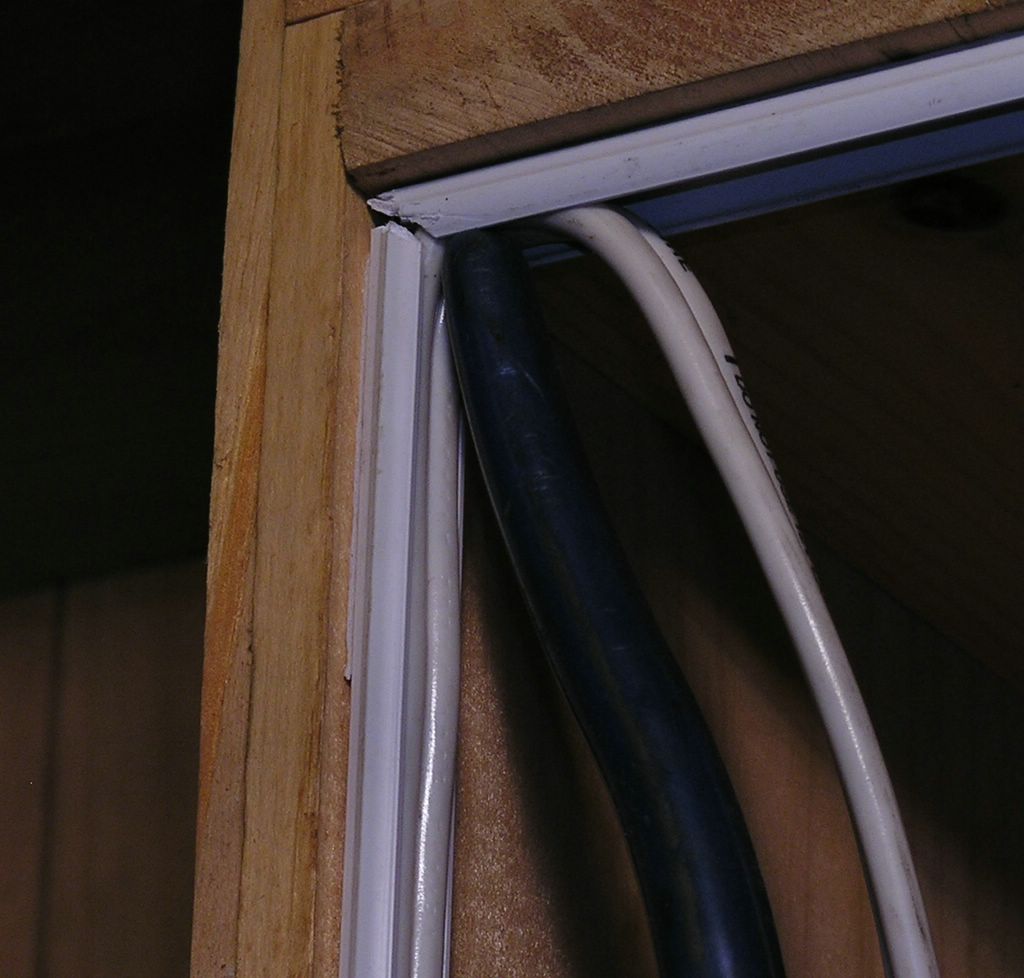
The cable should snap tightly into base and pushed into the corners with an insulated tool handle, in this case the insulated grip of my diagonal cutting pliers, or dykes. Pushing the cable into the corner in this manner is necessary especially when using the track cover piece, in order to make a crisp 90 degree turn, be extra careful not to damage the cable in any way.
If desired, the cover for the track can be cut with a power mitersaw and made to fit perfectly. This is a good idea in places where the undercabinet can be seen from another part of the room and the installation wants to be neat and clean. If each cover pieces are cut to the exact length necessary the individual sockets can be snapped to the track base, fit tight to the track cover on each side, and thus they are automatically spaced in exact increments . This takes careful measuring and cutting to pull off, but it is possible to do.
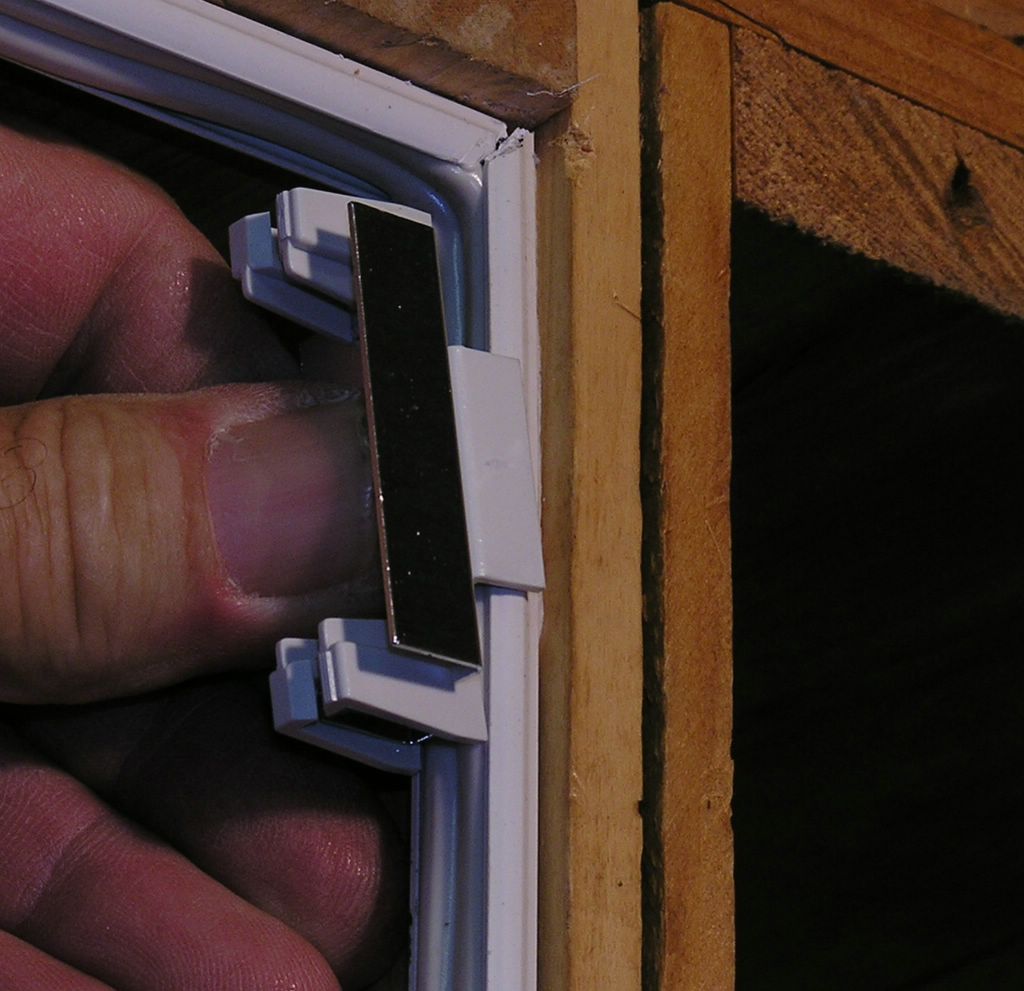
Pushing the lamp socket over the cable within the track the socket should be pressed down firmly until the unit seats and a snap is heard. This is to ensure a good connection. Be careful of those points, they are very sharp!
For the purpose of greater clarity, in this installation you will see the sockets and lamps from the front of the cabinet face, I will attach a cabinet rail later on which will hide these items.
Under normal circumstances, these items would be assembled behind the bottom rail of the cabinet door, while you were standing on your head, a lot like putting a radio in a '57 Chevy's dashboard! It should be clear that anything you can do before-hand to eliminate any space-time delirium while inverted, confusing left from right, up from down; that kind of thing, is very helpful. Unless you're a tree dweller!

Notice the socket has a reflector which must reflect the lamp's light back into the cabinet, don't put these in backwards, or the light would be reflected back at the cabinet rail.
For all intents and purposes, this installation will demonstrate how a china cabinet can be side-lit with this system, or a bookcase, stereo cabinet, etc.. Do you have trouble reading the label on a CD? Add Ambiance lighting to the CD cabinet and illuminate it!

These products are from Wiremold, a surface raceway system sometimes used in conjunction with the Ambinace system.
A functioning system actually roughed in by myself at another location, is presented here to illustrate a slightly different installation requirement.
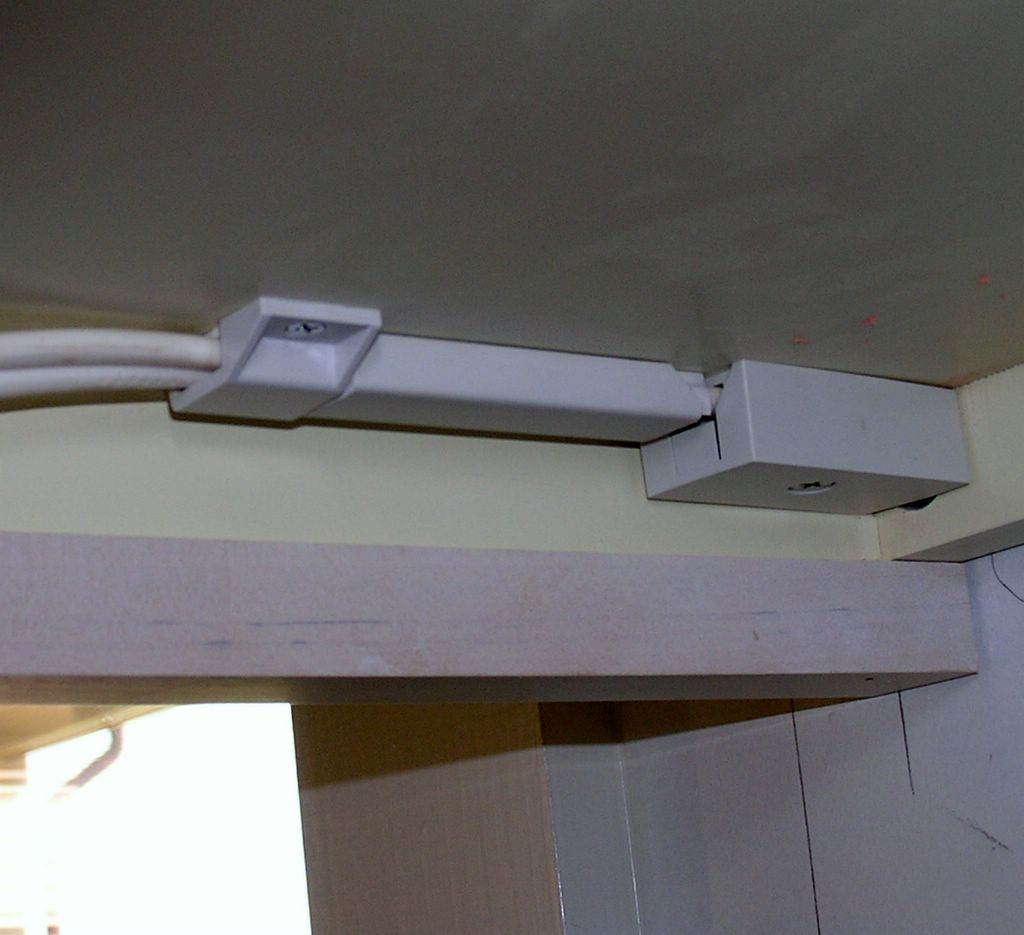 the junction box, trac base, cable and a 1-hole clip are installed under a cabinet. The junction box, or splice box, is installed here to change over from a 14/3 romex cable, to Ambiance cable.
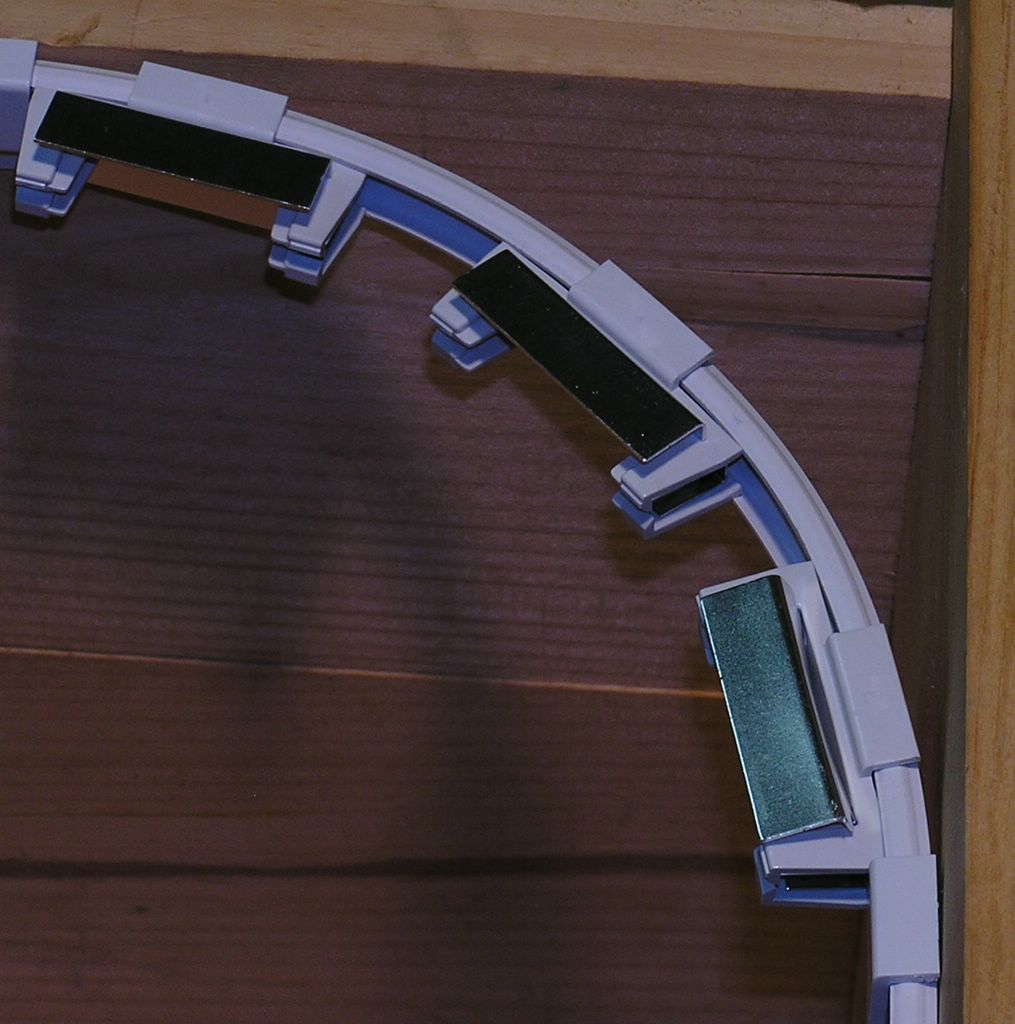
This photo shows how the trac can be bent around corners, a unique lighting scheme indeed.
posted by David @ 9:00 PM
![]()
![]()
0 Comments:
Post a Comment
<< Home