
IAUL, Episode 4
The Ambiance system can be adapted to many different uses, but the most commonly used area is in the kitchen. With all of the accessories available for this system, the functions are many and varied, various and sundry (read: lots).
There are other undercabinet lighting systems out there, including small rope lighting and even neon lighting, but none as adaptable and easy to install as the Ambiance system by Sea Gull Lighting, there is a link on the page to the company's website, check it out.
When I install these fixtures in a new dwelling, the room must be rough-wired with the use of the system in mind. Since the Ambiance is a low voltage (NEC definition of low voltage: operating at 50 volts or less) system, a few things must be considered and decided upon in advance.
First off, the light feed, from either a single pole or 3-way switching system does not feed directly into the fixture, as is normally done. The line voltage (120 volts) must be fed to the line side (primary) of a transformer, to be (what else?) TRANSFORMED into 12 volts! This transformer is called a step-down transformer, since the input (primary) voltage is higher than the output (secondary) voltage. A step-up transformer does the opposite, the primary (input) voltage is stepped-up, or increased in the secondary (output).
That said, the circuit is wired so that the switched conductor, or light feed, is run to a remote location where a transformer could be mounted. I say remote, since the transformer will be installed in a convenient location, but out of sight and in a well ventilated space (read: not in a confined clothes closet).
For undercabinet lighting systems it makes sense to put the transformer under the kitchen sink where it will always be accessible and servicable. The transformer could be mounted on the cabinet back wall, or other suitably accessible location. The line (120 volt) leads are entered into a suitable junction box, usually a 4" square box, and the load leads, or cables to the light system, are entered into a separate junction box. The transformer can be mounted to the board or mounting surface in between the two junction boxes. The line voltage leads (black and white) are fed into one box, for connection to 120 volts, and the load lead conductors (since polarity is not an issue) are usually the of same color, and connect to the leads (14/3 romex) from the undercabinet.
Also available for these systems is a self-contained transformer where a junction box is included. The low voltage conductors (50 volts or less) must be kept separate from the line voltage (120 volts) by means of an isolating divider between the two voltage sections of the junction box.
When we rough in the wiring for the self-built light fixtures, the only thing we can do is vamp the wiring between the undercabinet location and the transformer location. We use 14/3 romex for this purpose. The cable ends are to be poked out of the wall and routed through the cabinet back and under the bottom shelf of the upper cabinet. Usually there is an extension of the back of the cabinet, or a portion of the frame, that extends down below the cabinet's bottom shelf. This is the recess that we will use to hide the fixture.
In some cases, where the cabinet door is the only member to close off this space under the cabinet shelf; if the cabinet door fits flush against the shelf and when it is opened you can look under and see the shelves' front edge. In this event, a second member must be installed to which the trac base will be held and adhered to the undersides of the cabinet, a trim piece can be used, or a matching wood member is all that is needed.
When we are complete with the rough in wiring, we will have 14/3 cables coming out of the walls where the upper cabinets will be installed. When roughing in the idea is to shoot for a corner of one of the upper cabinets, where the track light will begin along and behind the front edge of the cabinet.
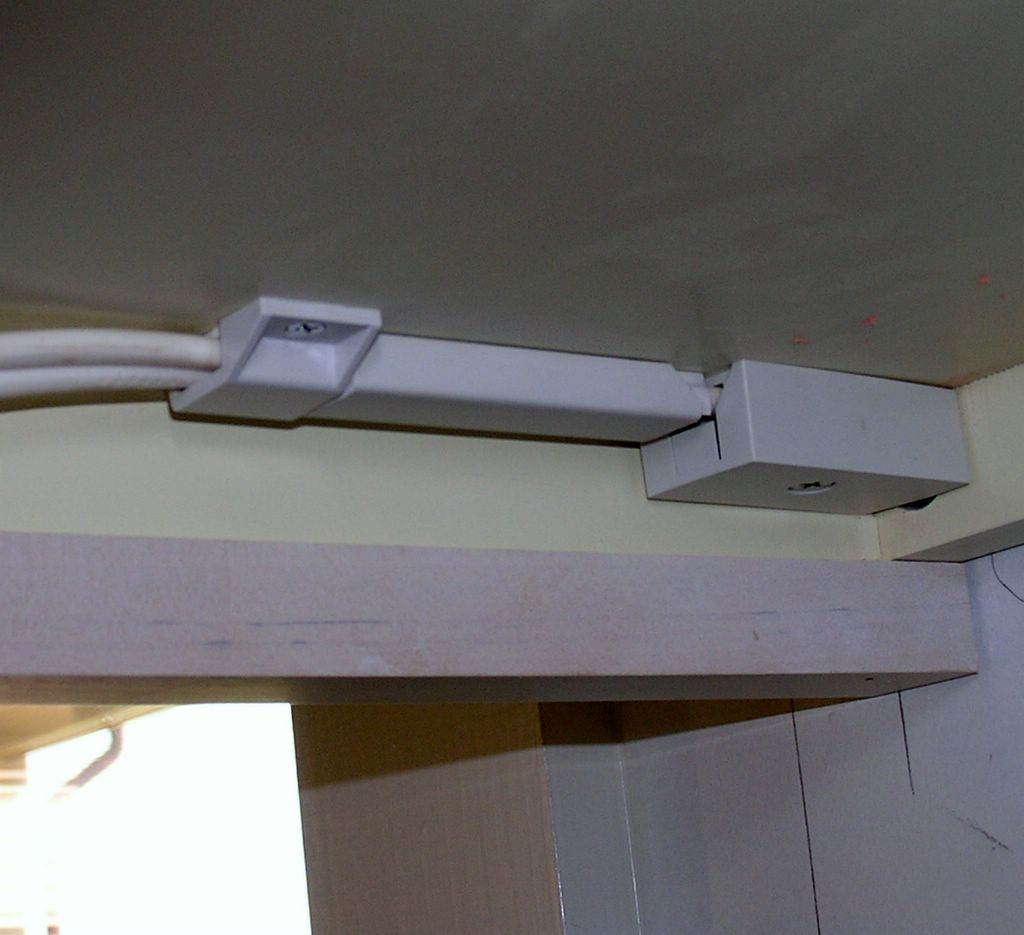
The small junction box is where we make the transition from romex to Ambiance undercabinet cable. It consists of two barrel splices, with two set-screws on each for connection of the # 10 AWG Ambiance cable and the 14/3 romex cable. The # 10 conductor will fit into the barrel, even though it looks tough. The 14/3 is stripped of it's outer jacket and the leads are cut and stripped to fit inside the box's confines. The black and red conductors are placed side by each under the same set screw, in the same barrel splice, thus two conductors become one and the extra conductor cross-section girth helps to eliminate voltage drop by up-sizing the effective ampacity of the cable. The ground (bare) conductor and the white (grounded) or neutral conductor are likewise paired under the set screws in the second barrel and tightened fast. The cover screw is the mounting screw for the box and also a keeper for the cover itself.
From the switching system we run the 120 volt switch leg, or load side, to the separate junction box under the sink base. The line side is connected to the 120 volt leads, the load side to the 12 volt 2-conductor Ambiance cable. For this system to work properly Sea Gull lighting recommends the useof their own transformer, doing otherwise (using another transformer manufacturer) may void the warranty on the Ambiance system.
The Ambiance system is viewed best at night, and a dimmer can be used to add further ambiance to the room. Caution, a low voltage dimmer must be used to dim low voltage loads, check with the manufacturer of the transformer. Enjoy!
posted by David @ 9:00 AM
![]()
![]()
0 Comments:
Post a Comment
<< Home